In episode 42 on #MerryBiz podcast we share our Simple How to Start a Podcast Guide! BUT if you don’t feeling like listening… you can read it all below! Do you like to read or listen? Or both?!
First things first, let’s chat about WHY you wanna start a podcast. Because that’s really going to shape the show! I.e. guests you’ll interview, one-woman-show, funny, serious, topical etc. etc.
STEP ONE: WHAT IS YOUR PODCAST ABOUT?
At this point you want to understand the goal of your podcast.
- Is it purely for fun (this is a good goal by the way!)?
- Is it to reach a larger audience to amplify your business?
- Is it to connect with likeminded people?
Work that out and you’ll be able to better understand what the heck you’re podcast is going to be about!
In saying that, you can totally just start a podcast and talk about what ever you feel like. There’s no rules.
STEP TWO: NAME AND INTRO AND COVER ART
Come up with your podcast name and intro. Ours is called #MerryBiz and it helps you create an epic life and business. YAY! Dan Norris’ is called 7 Day Start Up and it talks you through business with no BS. #GirlBoss showcases ladies who run da world. Joe Roegan’s podcast is… well, who really knows what his is about but it’s EPIC and he interviews the coolest people and they talk about the weirdest stuff.
Come up with your name and record your intro. This intro will be played on every podcast episode! You can record it yourself (Carla did ours… she says ‘entrepreneurs’ funny) or you can pay someone to record it for you, or get a friend. Whatever. Someone who has a nice voice. You’ll also need some music that you’re allowed to use. The AMAZING Drawing North boys (they’re a famous band) let us use a track off their album which kinda rocks. But you can find music on a site like AudioJungle.
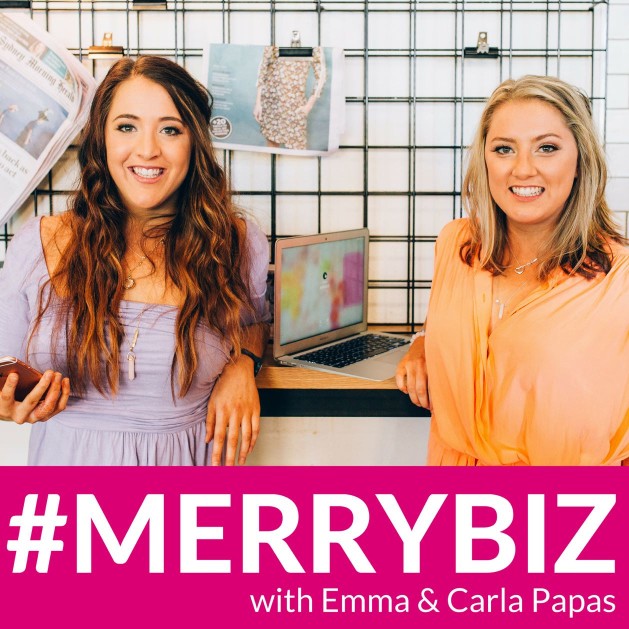
You need to also create a totally awesome cover art! We made ours on Canva. To make it retina ready, create a .jpg file that is 3000 x 3000 pixels. You want your cover art to STAND OUT and be easy to read. Here’s ours, we love it. EPIC photography from Rialba Photography (as always!). GET A GOOD PHOTO. Make your cover art amazing.
STEP THREE: SCHEDULE RECORDING
Now you know the style of your podcast, you want to get your intro and at least first 5 episodes ready to go. Why 5 episodes? Well legend says (AKA Dan Norris, Chris Ducker, Darren Rowse and Pat Flynn) claim that the more episodes you have upon launch, the more downloads you’ll get when you first launch. Makes sense! If someone listens to episode 1, they will want MORE and BOOM there’s another 4 to listen to!
This will give you more of a chance of ranking in the New and Noteworthy section of the iTunes app. And you want that.
If it’s going to be an interview style podcast, then you need to arrange those interviews and schedule them in! We recommend you set aside one day to record all 5. That way your brain is in PODCAST MODE.
It will also save you time, because setting up your equipment is like a 10 minute job, if you only have to do it once every week, that rocks for efficiency.
If you’re scheduling interviews, you want to make it SUPER easy for your interviewees to pick a time that suits them. We use Calendly. It’s our favourite calendar we’ve tried so far. We’ve also tried ScheduleOnce (also good, not as pretty) as well as Assistant.to for gmail (really cool, but kind of annoying as you have to set times every email. Really good for one off meetings though!). Calendly is about $10 a month. We love it. We also use it when other people want to interview us… so they fit in with our recording times too! Cool, huh?!
We interview on Wednesdays and oh MAN are they high vibes days. Interview after interview. AHA! Moment after AHA! Moment! We love Wednesdays!
STEP FOUR: RECORDING EQUIPMENT
This is the step everyone has been waiting for, right? It’s always: what mic do you use? How do you record? How do you edit? Etc. etc!
We’re going to share the EXACT equipment and software we use and the steps to follow.
Schedule your interviews/recording day using a booking software (e.g. Calendly).
To record interviews we use Skype and ecamm recorder. We make sure that the settings are set to ‘record all Skype conversations automatically’ that way we’ll NEVER accidentally not press RECORD. Oh the horror if that happened.
ecamm recorder is like a one off $30 product and records both sides of the conversation separately which is great. Our friend Chris Ducker also recommends having a back up recording like ZenCastr. We don’t do this yet… we should.
HOT TIP: ALWAYS ALWAYS make sure both your Skype and ecamm recorder software is UPDATED before each recording session. That is, click CHECK FOR UPDATES.
During our first EVER interview we didn’t update ecamm recorder and our voices sounded like chipmunks! It was lucky that the interviewees line was clear (as each line is a separate recording), so we could fix it by splitting the tracks and re-recording our end, yep, guessing and trying to remember the questions we asked by listening to the interviewee adding in umms and ahhhs where required. Yep, it was stressful, yep we got through it… but now you’ll never make this mistake! We wonder if you can guess which interview this was?! 😉
USE A MICROPHONE! We got a $99 microphone, it’s the ATR-2100, USB mic. All you have to do is plug it in and update your Skype preferences to the ATR and NOT computer settings. There are so many microphones out there. We went for the cheapest option and it freaking rocks. Our sound is on point (we reckon).
USE HEADPHONES! We have Beats… because they’re cool. But you don’t need fancy ones.
You’re interviews will record and be saved as .mov files to the folder you selected when setting up ecamm recorder. We just have a folder on our desktop titled ‘#MerryBiz recordings’ you can do the same… just don’t title it #MerryBiz. Because that would be weird!
Now what?
STEP FOUR: EDIT (IT’S NOT SCARY OR HARD)
Editing is NOT hard. True story.
To edit your podcast you’ll need to transfer your .mov files into .aif files. ecamm recorder comes with all the tools to easily do this. You can also SPLIT the conversation in case anything funky is happening in the interview recording OR one side is much louder that the other, as you’ll want to fix that in the editing process.
We use GarageBand to edit but you can also use Audacity or Audition. GarageBand is free on Macs. Yay APPLE!
Upload your files in this order to edit: Intro > Interview or Recording > Outro. If there are any mistakes you want to get rid of, then edit them out… or keep them in! We keep all our ‘mistakes’ in because they’re funny!
Eventually you’ll work out your own style!
Then export this as an .aif file.
You can eventually outsource this process. Our VA (Merry Ann) now edits our podcast which is AMAZING. She is amazing.
STEP FIVE: GETTING YOUR SOUND EXTRA GOOD
We then upload the .aif file to Auphonic. This is a sound neutralising tool that is mostly free (if you only do 5 hours a month). At this point you export as an .mp3. We read that this is the right thing to do on Dan Norris’ podcasting guide, so we followed it.
STEP SIX: PUBLISHING AND GETTING IT ON ITUNES
We went the easiest way for publishing and hosting our podcast. We use Libsyn, which creates an rss feed for us that we used to upload to iTunes and Sticher (most people listen to podcasts on these apps).
Basically, you connect Libsyn to your blog, upload podcast episodes and then your iTunes feed and Sticher feed will automatically receive each new episode because of that rss.
You’ll need to create a ‘podcast’ category on your site, check ours out HERE and then you should follow the steps on the Libsyn support site… when you first sign up they’ll give you these links. We’re not going to copy and paste what they say. That would be pointless. We followed this to a ‘T’ and it worked.
T0 get it on iTunes you’ll need to follow the steps to ‘Submit a Podcast’.
- Go to iTunes and click on Podcasts, top left.
- On the right hand side of iTunes there will be a link ‘Submit a Podcast’. Click that.
- Enter your rss feed URL and follow the rest of the steps to select your category, add description etc.
- You’ll then receive a confirmation email once your podcast has been approved. Yay for that!
HERE is the link to everything from submitting, to checking on your submission to extra tips.
As we said, our podcast is also on Sticher, you can put it on SoundCloud, GooglePlay, even repurpose with slides to YouTube!
STEP SEVEN: PROMOTION
Now you need to get people to listen to your podcast! Yay! If you already have an email list, tell them about it and ask them to tune in! You should also ask them nicely to leave you a review (5 star preferred!).
We send out a new email every week with the latest episode to people who have signed up to be notified. Every Tuesday to be exact. If you haven’t signed up yet YOU SHOULD HERE!
If your podcast is interview style then be sure to let each interviewee know once their episode is live. We like to create shownotes (see our format HERE, we follow this for every interview) and THEN we have our VA create share-able quote images using Canva of key quotes from every guest. Actually, we’ve now created a process where our VA writes draft shownotes too! Outsourcing! Yew! Here’s an example of our quote promo…

We email each guest these quotes and ask them nicely to share it out to their crew! We have had most guests share these quotes with their communities, creating greater reach for our podcast.
We’ve also sent guests bunches of flowers and boxes of donuts just to say thanks for their time.
We upload our podcast blog posts in MeetEdgar, so this means our podcast is shared automagically through Twitter and Facebook every week, without us even having to think about it!
We also talk about our podcast ALL the time because we love it and whenever we get interviewed on a podcast and the interviewer asks us where people can find us, we’ll always say #MerryBiz podcast.
STEP EIGHT: BE CONSISTENT
Are you sharing a new episode every week? Every second week? Whatever it is, keep it consistent. We think it’s ok if you want to do MORE but try not to completely forget one week. People are WAITING for the latest and greatest! One week we posted 5 new episodes and people went on a serious #MerryBINGE. It was the best.
STEP NINE: HAVE FUN!
To be honest, this is the most important. Our podcast energises the heck out of us. Whenever we talk about it, record, interview, promote anything to do with #MerryBiz we get so darn excited and have so much fun. WE LOVE IT. We totally believe this shines through in each episode. If you’ve started a podcast and you love it… then YAY! If you don’t, then change it up, try something new! Don’t create something that you hate or dread doing… there’s just no point!
Just because something works for someone else doesn’t mean it will be right for you. Follow YOUR bliss. Follow what you love to do and try new things.
Woha, this post was so long. But it needed to be. We wanted to give you a super thorough guide to creating your own podcast. Something that you can read step-by-step and implement right away.
If you have any more questions about how or why to start a podcast, leave us a comment below and we’ll get back to you!
Also, be sure to listen in to the episode because we go a little deeper into what a podcast has brought for OUR business and how it’s helped us grow as individuals and a team.
For now! It’s time to go get your podcast on… or at least have a brainstorm (chaistorm or winestorm) about the name of your podcast! WOOHOO!
Always merrymaking,
Emma + Carla
p.s if you DO start a podcast, we’d LOVE to know about it and be interviewed on your show. We love doing that. Get in touch and let’s set it up in your calendar 😉
P.p.s you’ll also love